前言定义属性Attribute资源实例
定义XML属性资源自定义ImageView类使用MainActivity代码
前言
Android本身给我们提供了很多的属性,像我们经常要用到的:android:layout_width="match_parent"、android:layout_height="match_parent"等等……
但是有时候,我们需要用到自定义的View,自定义View可以在代码中使用,也可以在XML界面布局中使用,那么我们就可以给我们的自定义View增加只属于它自己的属性,通过这些属性可以使我们更好的控制View组件的外观以及行为。这一篇主要讲解下自定义属性的运用。
定义属性(Attribute)资源
属性资源文件放在/res/values目录下,文件名字是:attrs.xml,由于IDE创建时没有帮我们自动生成这个文件,所以我们需要自己创建attrs.xml文件。attrs.xml文件的根元素是<resources../>元素,该元素下包含了如下两个子元素:
* attr子元素:定义一个属性。
* declare-styleable子元素:定义一个styleable对象,每个对象都是一组attr属性的集合。
下面以一个自定义默认带动画的图片来演示下自定义属性的运用。
实例
定义XML属性资源
<?xml version="1.0" encoding="utf-8"?>
<resources>
<attr name="duration"/>
<declare-styleable name="AlphaImageView">
<attr name="duration"/>
</declare-styleable>
</resources>
上面的属性资源文件中,定义了一个duration的属性,定义了这个属性之后,这个属性到底在哪里使用就不归属性资源文件管了,属性资源文件中的属性到底可以发挥什么作用,完全由自定义View中的代码实现。
注意:在属性资源文件中定义<declare-styleable.../>元素时,可以在其内部直接使用<attr.../>定义属性,使用
自定义ImageView类
/**
* 描述:默认带透明动画的ImageView
*/
public class AlphaImageView extends ImageView {
// 图片透明度每次改变的大小
private int alphaDelta = 0;
// 记录图片当前的透明度
private int curAlpha = 0;
// 每隔多少毫秒透明度改变一次
private final int SPEED = 300;
Handler handler = new Handler(){
@Override
public void handleMessage(Message msg) {
curAlpha += alphaDelta;
if(curAlpha >= 255) curAlpha = 255;
AlphaImageView.this.setImageAlpha(curAlpha);
}
};
public AlphaImageView(Context context,AttributeSet attrs) {
super(context,attrs);
// 获取attrs.xml资源文件中定义的duration属性 TypedArray typedArray = context.obtainStyledAttributes(attrs,R.styleable.AlphaImageView);
int duration = typedArray.getInt(R.styleable.AlphaImageView_duration,0);
// 计算每次改变的大小
alphaDelta = 255 * SPEED / duration;
}
@Override
protected void onDraw(Canvas canvas) {
this.setImageAlpha(curAlpha);
super.onDraw(canvas);
final Timer timer = new Timer();
timer.schedule(new TimerTask() {
@Override
public void run() {
if(curAlpha >= 255){
timer.cancel();
}else{
handler.sendEmptyMessage(0);
}
}
},SPEED);
}
}
详解")
上面的代码中,我们获取了定义的duration属性,并通过该属性计算图片透明度的变化幅度。
使用
<LinearLayout xmlns:android="http://schemas.android.com/apk/res/android"
xmlns:crazyit="http://schemas.android.com/apk/res-auto"
xmlns:tools="http://schemas.android.com/tools"
android:layout_width="match_parent"
android:layout_height="match_parent"
android:orientation="vertical"
android:paddingBottom="@dimen/activity_vertical_margin"
android:paddingLeft="@dimen/activity_horizontal_margin"
android:paddingRight="@dimen/activity_horizontal_margin"
android:paddingTop="@dimen/activity_vertical_margin"
tools:context="com.airsaid.attributedemo.MainActivity">
<Button
android:layout_width="match_parent"
android:layout_height="wrap_content"
android:onClick="show"
android:text="显示图片" />
<com.airsaid.attributedemo.AlphaImageView
android:id="@+id/imageView"
android:layout_width="wrap_content"
android:layout_height="wrap_content"
crazyit:duration="60000" />
</LinearLayout>
注意:使用自定义View的时候,注意加入我们自己的命名空间:xmlns:crazyit="http://schemas.android.com/apk/res-auto"
其中crazyit我们可以随意起。
MainActivity代码
public class MainActivity extends AppCompatActivity {
private ImageView mImageView;
@Override
protected void onCreate(Bundle savedInstanceState) {
super.onCreate(savedInstanceState);
setContentView(R.layout.activity_main);
mImageView = (ImageView) findViewById(R.id.imageView);
}
public void show(View v){
mImageView.setImageResource(R.mipmap.ic_launcher);
}
}
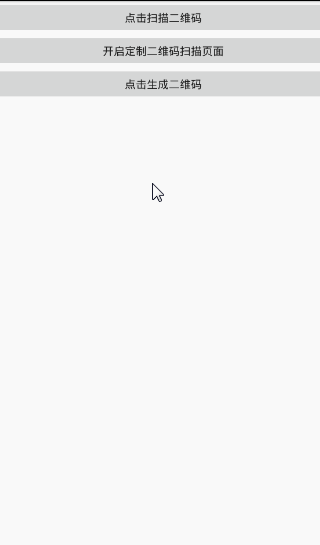
运行结果:
当我们点击按钮时,图片显示时会有一个透明动画效果。代码很简单并贴的很全,就不上传了。