版权声明:本文为博主原创文章,未经博主允许不得转载。 https://blog.csdn.net/u012691505/article/details/72529179
Google I/O 2017 上将Kotlin升级为Android开发的官方语言,关于Kotlin的特点之类的建议去官网自行了解Kotlin官网。
我所使用的开发工具是AndroidStudio,如果你用IDE相差也不大。下面开始进行开发环境的搭建。
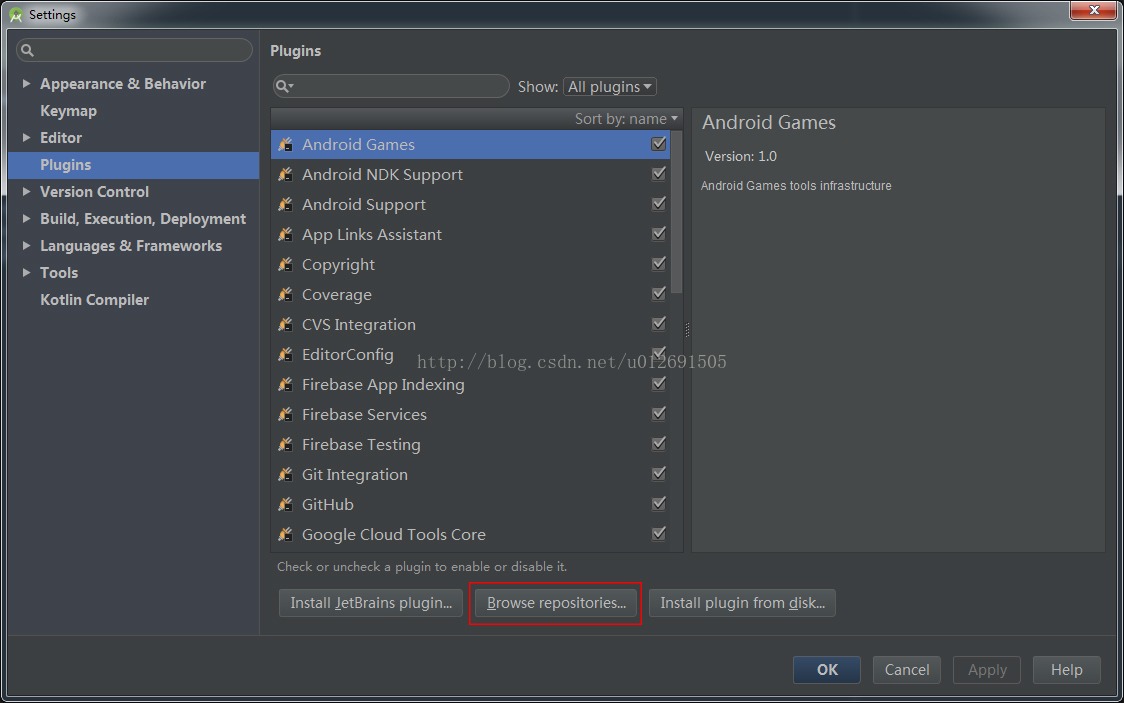
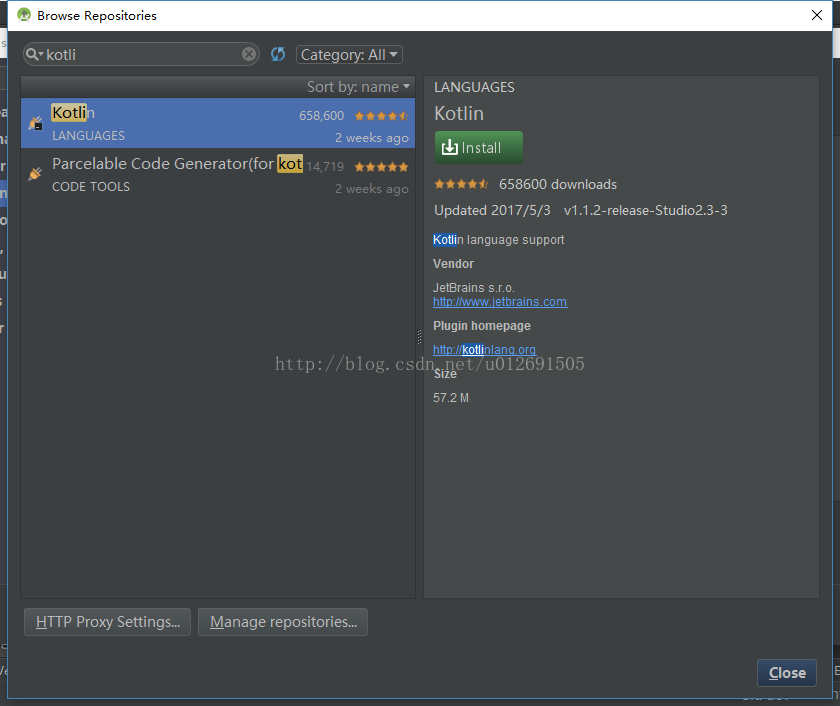
1.下载Kotlin插件
Settings -> plugins -> BrowseRepositories,搜索“Kotlin”
注(网上很多教程中会有Kotlin
Android Extensions ,这个插件已经搜索不到,之后可以在gradle中进行配置)
2.插件安装成功(若没有,你可能需要重启Studio)
这两个Kotlin文件应该不需要解释吧。
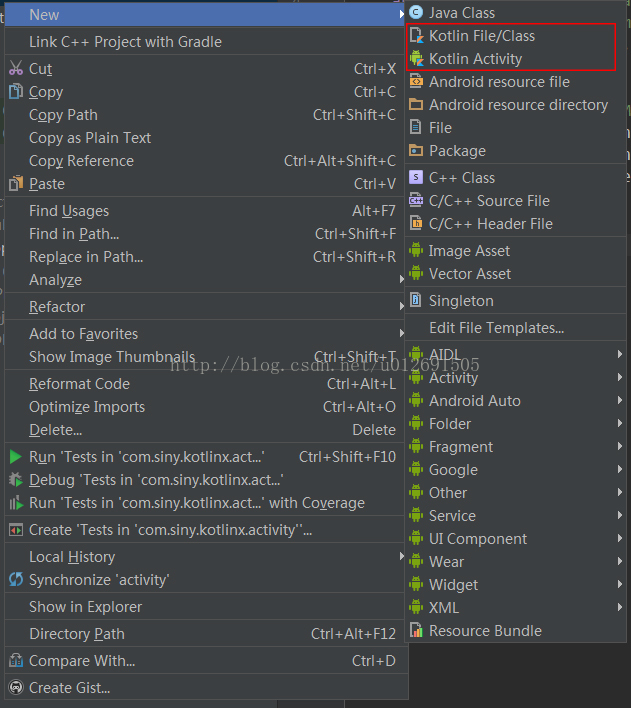
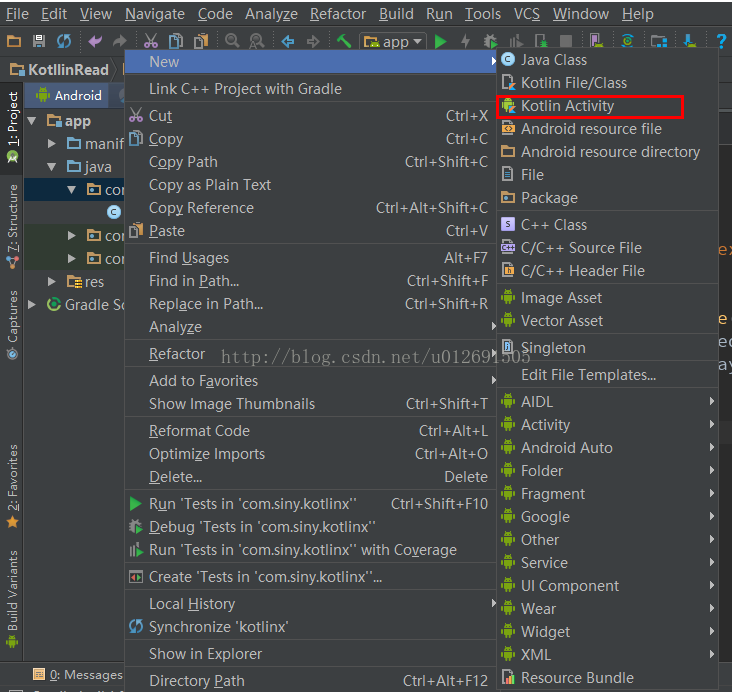
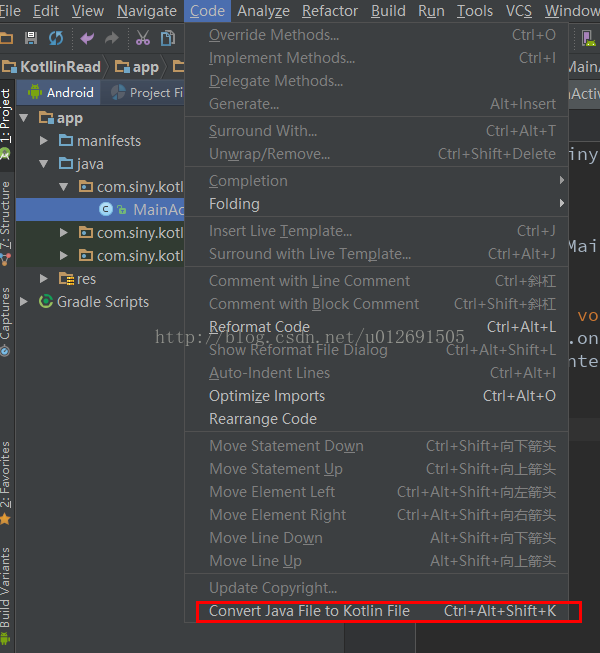
3.配置Kotlin(如果你有Activity参考m2)
m1:new->Kotlin Activity
m2:Code->Convert java File to Kotlin File
kt Activity创建好之后,studio出现会提示
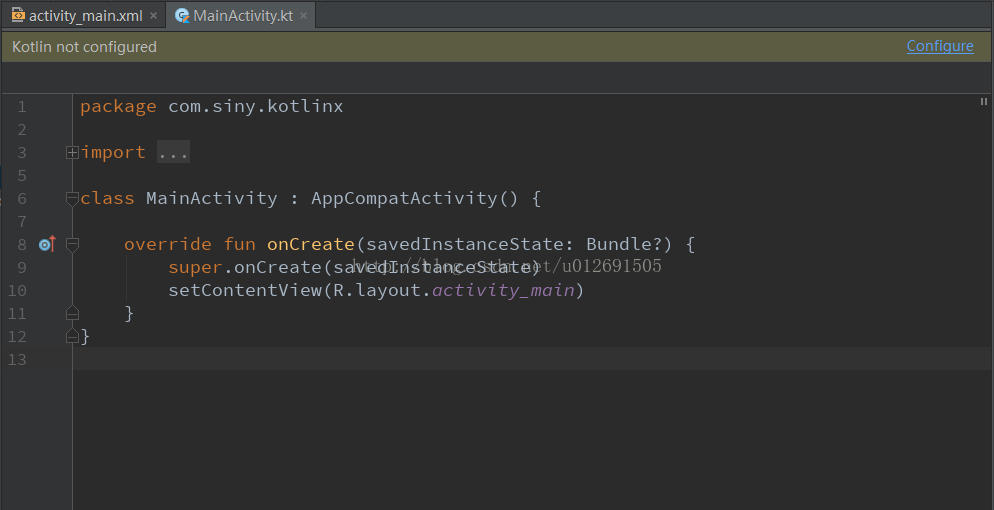
点击提示,选择如下
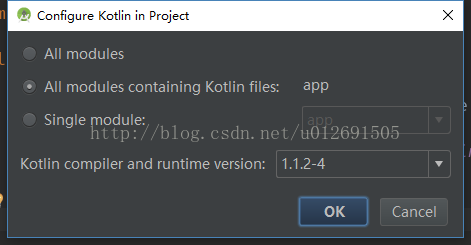
完成之后 Sync Now一下gradle。Kotlin环境就配置好了,这时候你就可以使用了。但不知道你是否还记得前面提到的 Kotlin Android Extensions,接下来就开始配置。
4.配置Kotlin Android Extensions
在Module gradle中添加
buildscript {
repositories {
jcenter()
}
dependencies {
classpath "org.jetbrains.kotlin:kotlin-android-extensions:$kotlin_version"
}
}
配置完成后即可使用
import kotlinx.android.synthetic.main.activity_main.*
5.验证
Project gradle
// Top-level build file where you can add configuration options common to all sub-projects/modules.
buildscript {
ext.kotlin_version = '1.1.2-4'
repositories {
jcenter()
}
dependencies {
classpath 'com.android.tools.build:gradle:2.3.2'
classpath "org.jetbrains.kotlin:kotlin-gradle-plugin:$kotlin_version"
// NOTE: Do not place your application dependencies here; they belong
// in the individual module build.gradle files
}
}
allprojects {
repositories {
jcenter()
}
}
task clean(type: Delete) {
delete rootProject.buildDir
}
Model gradle
apply plugin: 'com.android.application'
apply plugin: 'kotlin-android'
apply plugin: 'kotlin-android-extensions'
android {
compileSdkVersion 25
buildToolsVersion "25.0.3"
defaultConfig {
applicationId "com.siny.kotlinx"
minSdkVersion 17
targetSdkVersion 25
versionCode 1
versionName "1.0"
testInstrumentationRunner "android.support.test.runner.AndroidJUnitRunner"
}
buildTypes {
release {
minifyEnabled false
proguardFiles getDefaultProguardFile('proguard-android.txt'),'proguard-rules.pro'
}
}
}
dependencies {
compile fileTree(dir: 'libs',include: ['*.jar'])
androidTestCompile('com.android.support.test.espresso:espresso-core:2.2.2',{
exclude group: 'com.android.support',module: 'support-annotations'
})
compile 'com.android.support:appcompat-v7:25.1.1'
compile 'com.android.support.constraint:constraint-layout:1.0.2'
testCompile 'junit:junit:4.12'
compile "org.jetbrains.kotlin:kotlin-stdlib-jre7:$kotlin_version"
}
buildscript {
repositories {
jcenter()
}
dependencies {
classpath "org.jetbrains.kotlin:kotlin-android-extensions:$kotlin_version"
}
}
repositories {
mavenCentral()
}
完成以上步骤,Kotlin开发环境就搭建好了。下面测试一下,我们的程序是否能运行
MainActivity代码:
import kotlinx.android.synthetic.main.activity_main.*
class MainActivity : AppCompatActivity() {
override fun onCreate(savedInstanceState: Bundle?) {
super.onCreate(savedInstanceState)
setContentView(R.layout.activity_main)
tvMessage.text="Hello Siny!!"
}
}
activity_main.xml
<TextView
android:id="@+id/tvMessage"
android:layout_width="wrap_content"
android:layout_height="wrap_content"
android:layout_centerInParent="true"/>
运行界面: